Installation Instructions
Large Compression Fittings Product Range

Last Updated

December 11, 2020

Flowflex reserve the right to alter the product ranges and specifications associated with its products without prior notice

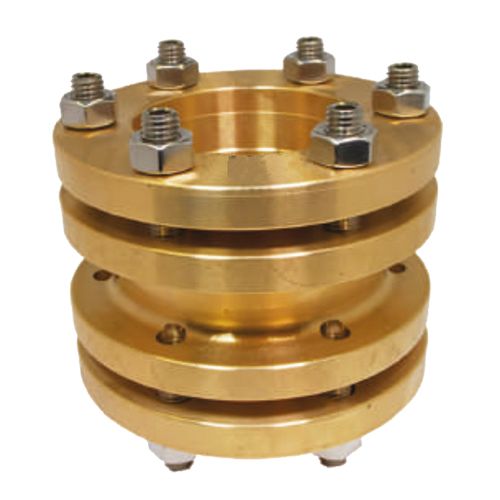
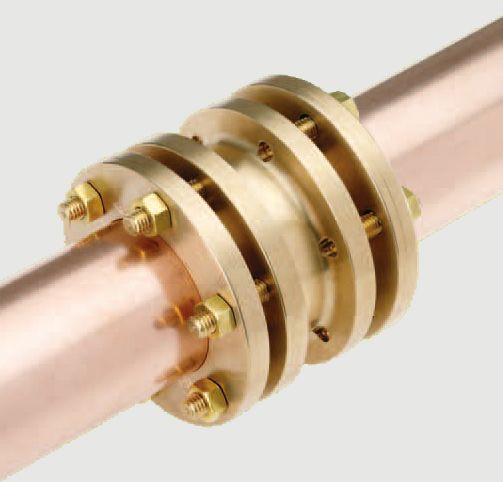
Manufactured to the highest standards in the UK, our complete range of large brass compression fittings, sizes 67mm to 108mm, provides the reliability and quality demanded by todays professional installers. Fittings are designed to join copper pipe creating a heat free mechanical joint upon tightening the various nuts onto the flange faces.

Applications

  • Commercial
  • Industrial

Preliminaries

Select the correct size of tube and fitting for the job. Ensure that both are clean, in good condition and free from damage and imperfections.

Copper tube should conform to BS EN 1057 and be of hard (R290) or half-hard (R250) tempers.

Equipment

Materials
  • Copper Pipe
  • Large Compression Fitting
Tools
  • Adjustable Spanner
  • Pipe Cutting Tool
  • Internal & External Pipe Deburring Tool

Installation

Preliminaries

Preliminaries

Select the correct size of tube and fitting for the job.

Ensure that both are clean, in good condition and free from damage and imperfections. Copper tube should conform to BS EN 1057 and be of hard R290 or half-hard R250 tempers.

Preparation

Preparation

Cut the tube square using a rotary tube cutter wherever possible. If a hacksaw is used to cut the tube, a fine-toothed blade should be used.

Remove any burr from the inside and outside of the tube ends using a fine-toothed file.

Connecting

Connecting

Place the flange and compression ring on to the tube. Insert the tube firmly into the fittings body, ensuring that the compression ring seats centrally and that the tube makes firm contact with the tube in the body.

Bring up the compression flange, and tighten the nuts by hand. Using a spanner continue to tighten the nuts diagonally in increments on ½ turn, to a minimum of 2 turns and maximum of 2 ½ turns.

DO NOT OVER TIGHTEN THE NUTS.

The compression flange should be parallel to the face of the body to indicate that a sound joint has been made.

If after assembling the joint in accordance with the instructions above a slight weep is experienced – as occasionally may happen – it will readily be corrected by the application of a smear of an approved sealing compound to the sealing faces.

When fitting any reducer, remove the flange and compression ring from the end to which the reducer is being fitted. Then follow the connecting instructions as above.

Testing

We recommend that all systems are throughly tested upon completion. Whenever possible, completed systems should also be flushed to remove debris.

Hydraulic Installations

In hydraulic based installations, the system may be tested to 1.5 times the working pressure of the system. If higher test pressures are required, then please contact us for further advice.

Any Questions?

Our team is available for you anytime.